  9 times out of 10 when you first went natural you had a plan. You knew why you went natural and how you wanted your hair to look. You read the popular natural hair blog posts, watched YouTube videos and hung on to their every word. Then you went and purchased every product @Ihavethebiggestandbestnaturalhairever said to buy and commented "yassss and #hairgoals" on every single picture. Oh...that was just me lol?
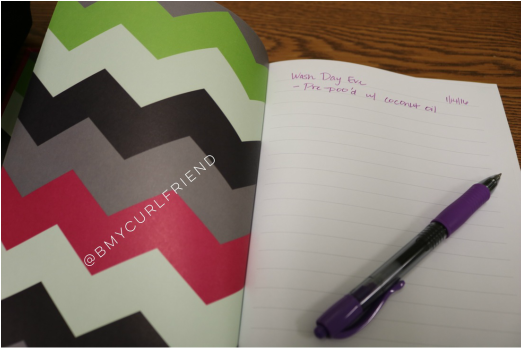
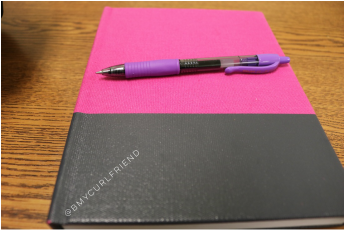
Personally, somewhere between the big chop and trying to get my hair to look like every hair crush imaginable, I have purchased countless products and tried countless techniques. Sometimes these techniques worked terribly and other times they worked great. Some blogger's "holy grail" leave-ins worked amazing for me and others not so much. My point is, when you start to try so many different products, techniques and regimens you are bound to start to forget what is actually working for you and what isn't. This lead me to start keeping a hair journal. In my hair journal, I keep track of everything related to MY HAIR. I list the products, techniques and styling methods I used. I even keep track of when I moisturized my hair. This my way of taking charge of my hair goals. Here are 5 reasons you should keep one too. 1. To Be Able to Know Which Product Did What Have you ever had a wash day that went perfectly? Your hair detangled with ease and it was super soft. Styling was a breeze and the next day you felt very Tracy Ellis Ross-ish lol. Your twist out was super defined and you mixed about 3 different products. Fast forward to next week's wash day and you look a hot mess. What changed? Which product actually gave the definition? Was the combination necessary? Being a product junkie sometimes leaves me unable to figure out exactly which product caused a change in my hair. Your hair journal will lend you a clue. 2. To Pinpoint When Your Hair Made Positive/Negative Changes The 2nd reason goes hand in hand with the first one. Sometimes I get so caught up in the routine of doing my natural hair and what has worked for me in the past, that I am unable to recognize when a certain method or technique has simply stopped working for me. Other times, I look back at my good hair days and I have no idea what I was using at the time to make my hair look so great. Keeping a hair journal will allow you to see exactly when you made a change. 3. To Discontinue the Use of Unnecessary Products and Techniques Jane Doe swears by using product X for her twists out, three strand twist outs, and double braid-flat-twist-curl-and-go (I made that one up lol). You have tried product X on 3 different occasions and your hair resembles a bird nest. Document this in your journal and stop using it! Maybe you're like me and you swore by the LOC method but now you've noticed your hair isn't as well moisturized as it used to be. You know how they say don't force love, relationships or ponytails? Yea...that applies to natural hair products too lol. Your hair journal will force you to stop forcing it and explore other options. 4. Set Real #hairgoals and Stick to Them Keeping a hair journal will help you figure out what works for you instead of what works out for your favorite hair crush. Think of it as a personalized hair blog that has been customized just for you! There's absolutely nothing wrong with borrowing ideas and product suggestions from other naturals but at the end of the day what works for your hair crush, may not necessarily work for you. Once you have set your hair goal, your hair journal will help you stay consistent until you achieve your goal. 5. To Stop Being a Product Junkie Ok...maybe keeping a hair journal won't stop you from being a product junkie, but at least you will be a productive product junkie. Once you have been keeping your hair journal for a while, I am willing to bet that you will begin to see commonalities in the products that work for your hair and the ones that don't. Once you know what ingredients the products that don't work for you have in common, you can eliminate these when you go on product purchasing binges. If coconut oil doesn't work for you (God forbid!), it shouldn't matter how many people recommend a particular product to you. If it contains coconut oil, don't buy it. Do you keep a hair journal? What are some other things you would add to your hair journal? Sound off in the comments section.
0 Comments
 It is no secret that my favorite natural hair style to date is the twist out because of its versatility and longevity. I am always trying to find new ways to style a twist out, whether its fresh or a few days old. My favorite characteristic of a twist out is its ability to elongate my hair. The twist out that I am about to share with you gave me the most stretching I have experienced to date!! My hair looked closer to its true length and it was super defined. Before doing this twist out, I used the LOC (liquid, oil, cream) Method to ensure that my hair retained the oils and moisture that I put in it. Check out the video below to see how I achieved this look. 
They are literally everywhere you turn. Seemingly perfect curls and twists. That oh-so-desirable length. Moisture for days. Not a hair out of place. You think to yourself, "Man, I want her hair! I want my hair to do exactly what her hair does." You hastily approach this woman and almost scream out, "What did you use in your hair? How did you get it to do that?". You hang on to her every word, you make notes on the products she used, as well as her technique. You hurry to the nearest beauty supply store, go home and turn your bathroom into a personal hair salon. When you finish doing exactly what you thought she said, you look like a chia pet! LOL!!! Wanna know why? Those perfect curls and twists were HER natural. Having natural hair is a delicate balance between you wondering why you didn't go natural a decade ago to you toying with the idea of going back to a relaxer (GASPS!!!!! lol). Be strong. We all go through it. Everybody's natural hair is not the same. There are so many different textures, curl patterns ( or lack thereof) and lengths and they all are beautiful in a unique way. Being natural is much like some of the age old lessons we were taught as children: You just have to BE YOURSELF. Below are a few tips that may help you discover your natural. 1. Research, research, research. Find out what your curl pattern is. 2. Determine your hair's porosity (check out my blog post on hair porosity. here). This will help you to figure out which moisturizing technique will work best for your hair. Nobody likes a dry fro. 3. Know that what hair product works for one natural, may not work for you, which leads me into tip number 4.... 4. Products do NOT create curls that you don't already have. Example: Erica uses product x and her head is covered in curly awesomeness. If I use product x, then I too will have a head covered in curly awesomeness lol. Catch my drift? Since you have done your research and you know your curl pattern, then you know that whatever product you choose to use will only define and enhance your natural curl pattern. This is the whole point of being natural right? =) 5. Don't be afraid to try new styles and products, but never forget the basic products that first made you love your hair. I can't tell you how many times, I've become so consumed with trying new things that I forget that Kinky Curly leave-in is a great fit for my hair or that my homemade shea butter whip gave me one of the best twist outs I've ever experienced. 6. Love YOUR natural. You went natural for a variety of reasons. Try not to become discouraged if your hair doesn't look like your favorite naturalista's. Being natural is a unique experience for each woman. Own it! Check out my pictures of some of my natural hair victories and fails over the past year. lol 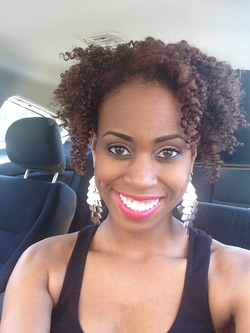 After doing a two conditioner co-wash (see blog post for details). I deep conditioned my hair with Eden Bodyworks All Natural Deep Conditioner. I followed this with the LOC method using Jane Carter Solution Revitalizing Leave-in Conditioner, lavender oil/water (for detangling), jojoba oil and Camille Rose Curlade Moisturizing Butter. Once my hair was detangled, I followed the steps below to complete a flat twist out. 1. Divide your freshly co-washed or shampooed and conditioned hair into four sections using clips. Make sure the front section is parted the way you like wearing your hair. 2. Starting from the bottom section take either 1/4 or 1/3 of the section (depending on your hair thickness) and finger detangle, shower comb detangle and denman brush detangle the section. (Feel free to add oil and water to aid in the detangling process. Remember to detangle from the ends to the root. Be careful!) 3. Work a generous amount of your favorite curl cream (Curlcare Soft Hold Cream) through the section. 4. Begin your flat twist with a small two-strand twist and continue to add hair to your flat twist all the way to the end of the section. 5. Either roll the end of the twist around your finger or roll the end of the twist with a flexi rod. 6. Repeat this process until you are done. Allow your hair to air dry overnight or use a hooded dryer. 7. Take the twists down VERY slowly using your oil of choice on your fingers. I used jojoba oil. It is important to take the twists down slowly to avoid frizziness. Think of taking your twists down as gradually and gently unraveling them. The flat twist out takes about half the time that it takes me to do a normal twist out! This excites me so much because it normally takes me at least an hour to do a regular twist out. My hair turned out to be a great deal more defined than a regular twist out and the curl pattern was a lot different. If you love twist outs as much as I do, you will love the flat twist out even more!! Its a nice change in my usual curl pattern and my hair was more stretched than normal. The only catch to using this method is that the drying time is considerably longer. Air drying took me about 10-12 hours or overnight. I would do this style the day before I was ready to wear it. You could also consider using a hooded dryer. Good luck! ***When I took my flat twists down, I decided to do a simple updo. I will post a tutorial for this later*** 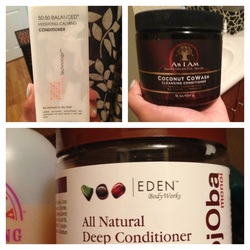 I am one of those naturalistas who just loves washing her hair. Yea, I know about the great benefits of co-washing. (Co-washing is "washing" your hair with a conditioner instead of a shampoo, see my youtube channel for a demo). I have also read that it is good to co-wash as often as every two days. Co-washing helps prevent natural hair from becoming too dry from frequent washing with shampoo. Knowing all of this, I always choose to wash my hair anyway. I just like starting my styling days off with fresh, clean, non-weighed down hair. My experiences with co-washing my hair have ranged from ok to just plain horrible. The "plain horrible" experience left my hair feeling like it had a residue on it. This made it difficult to style. Now that I have colored my hair, it's more important than ever that I properly condition my hair so that it will not be damaged. With that being said, coloring my hair has made me revisit the idea of co-washing my hair more often. I don't want my hair to break or my color to fade too fast. I set out to co-wash my hair yesterday and I was having a hard time choosing a conditioner. I absolutely love the As I Am Coconut Co-Wash Cleansing Conditioner but I also love the Giovanni 50:50 Balanced Hydrating-Calming Conditioner. I could not decide which one to use, so I decided to use both of them. My results were amazing! My hair is really soft and shiny. It was also easier to detangle. The moral of the story is that if you have two conditioners that both offer benefits that you desire, don't be afraid to try them both. You may be surprised at the results. I will say that a good rule of thumb for selecting your co-wash conditioners is to be sure that they don't contain any sulfates or parabens. Also, stay away from silicones. These ingredients can make your hair heavy and also leave a residue. Nobody likes weighed down curls. I followed my cowash with a brief deep conditioning using Eden BodyWorks All Natural Deep Conditioner. When I got ready to style my hair there was no residue. See my next tutorial to see the results of my first flat twist out!    Ever spend your precious time twisting or braiding your natural hair, only to untwist it and it looks like an undefined mass? It happens =(. One of the perks of having natural hair is its ability to be shaped with something as simple as a bobby pin. Spring and summertime weddings are the perfect time to put this to use!! I created this wedding style on a 2 day old twist out I did using Nothing But (brand) Pure Pudding cream. This cream was very light and therefore my twist out was not as defined as usual. This style is perfect for a twist out that did not turn out as defined as you would have liked. Follow the steps below to recreate this easy half-frohawk. 1. Using CurlCare strong hold gel, brush and smooth back the hair on front right side of your head and secure it with small bobby pins. 2. Once the hair is secure, arrange your twisted or curled hair to fall foward to cover or hide the pins. Arrange the rest of the hair from this section to your liking. (I did more separating of the twists and light teasing to make hair bigger) 3. Leave the other side of your twist unsecured and arrange curls to your liking. 5-10 minutes and you're done! How do you save your twist-outs or braid outs that you don't like? Please Share! 
 Let's face it, washing natural hair requires a bit of time and patience. I usually wash (or co-wash) and style my hair once a week, but every now and then I reach that 1 week mark and I just don't have time to wash my hair. My work schedule is strenuous and sometimes I am just dog tired. Hair that has been styled for a few days to a week often provides a great foundation for other hairstyles. When I'm too tired to wash my hair, I always ask myself, how can I make my hair look decent without washing and starting from scratch? I have really thick hair and the longer I go without washing it, the more tangled and matted it can become. When my hair reaches this point, I always immediately wash and condition. This particular day, I felt daring or maybe just lazy lol. Natural hair brainstorming almost always leads to an awesome style! Here are the steps I took to turn an old tangled twist out into beautifully defined and moisturized chunky twists. 1. Section hair and divide it using clips. 2. Smooth a moisturizer ( I used Camille Rose Naturals, Curlade Moisture Butter) into each section and finger detangle each section. 3. Starting from the back of your head, 2 strand twist large sections of your hair ( of course, being careful not to borrow from other sections of hair) When you get to the front of your head, part your hair the way you would like the twists to fall. 4. I slept about 5-6 hours with a silk bonnet and then undid my twists. 5. Separate the twists at least 2x for fullness. After you're done, your hair will be detangled and more manageable. It will also look great!! This only took about 20 minutes and I was able to last a few more days without washing my hair. 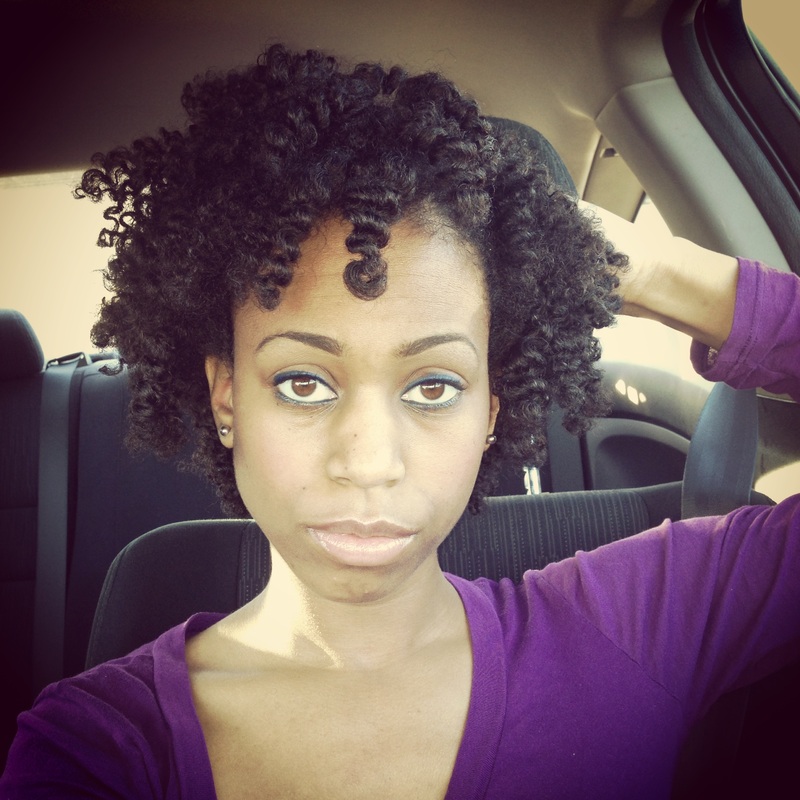 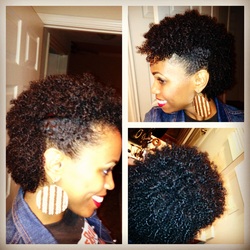 There's nothing worse than being short on time right before you have somewhere to be. Natural hairstyles require time. You're not going to get a twist out done in under an hour. (If you can, please show me how! lol). With that being said, it is always good to have some quick, but cute styles under your belt for those times when you still want to look want to make your hair look nice, but as quickly as possible. Check out the video tutorial for this quick freaux-hawk done on a wash and go. After co-washing my hair, this style took under 15 minutes to do!!  Forever on a quest for the perfect moisturizing regimen for my low porosity hair, I decided to try the LOC method. LOC is an acronym for liquid, oil and cream. You start your hair off with water or a liquid based leave-in conditioner, followed by an oil and finally a cream. The concept is that the oil will seal in the water (or water based leave-in conditioner) and the cream will seal in the oil into your strands. After repeated usage of this method, you should be left with well moisturized strands. Many naturalistas swear by this method and depending on your hair type you may experience the same success. Below is a list of what products I used for the LOC method.
L-Giovanni Direct Leave-In Conditioner O- Desert Essence Jojoba oil C-Eden Bodyworks Jojoba Monoi Hair Milk I started by treating my hair that had been rinsed with warm water with a baking soda/water mix to open my cuticles. I dried my hair using the plopping method. I followed this with deep conditioning with Shea Butter Intense Moisture Masque. I wrapped a towel around my hair and allowed this to sit on my hair for 30 minutes. After rinsing my hair with cool water to seal my cuticles, I sprayed it with an aloe vera juice/water mix to balance my hair's pH from the alkaline baking soda mixture. After detangling, I was ready to begin the LOC method. I sectioned my hair into 4 and worked a quarter sized amount of Giovanni Direct Leave-In into one section from root to tip. I rubbed a few drops of jojoba oil into my palm and rubbed it together. I also applied it to the section from root to tip. Finally, I rubbed a quarter size amount of the Eden Bodyworks hair milk into my hand and worked it through the section from root to tip. Repeat this until you have moisturized all sections. Verdict so far: My hair was noticeably shinier and softer. I will most definitely be trying this method again to see what the long term results are. I will keep you posted! 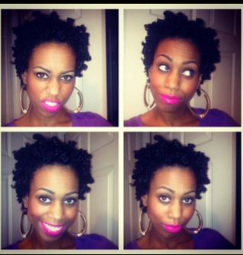 Everybody knows my absolute favorite natural hair style is a twist out because of its great curl definition and versatility. As much as I love twist outs, I decided to try something new and was pleasantly surprised! Bantu knots gave me exceptional curl definition as well as a totally different look that I love. The curls were tighter and just as easy, if not easier, to maintain overnight (don't tell my twist outs I said that lol). To maintain this style, I bantu knotted my hair in large sections using a little water in a spray bottle overnight and was able to wear my bantu knot out for five days! This is definitely a hair style that I will add to my arsenal. Very cute! |
Archives
July 2020
Categories
All
|
 RSS Feed